
Most bass riffs you get called upon to play contain between three and five notes, so why not assemble just the tubes you need for each tune – in the order they come, to keep it simple and lightweight?
I made my first modular set back in 1984, and two weeks had not passed before I got a call to use them at CTS studios in Wembley. The film was Emerald Forest. I will never know how the high-ups even found out about my revolutionary instrument.
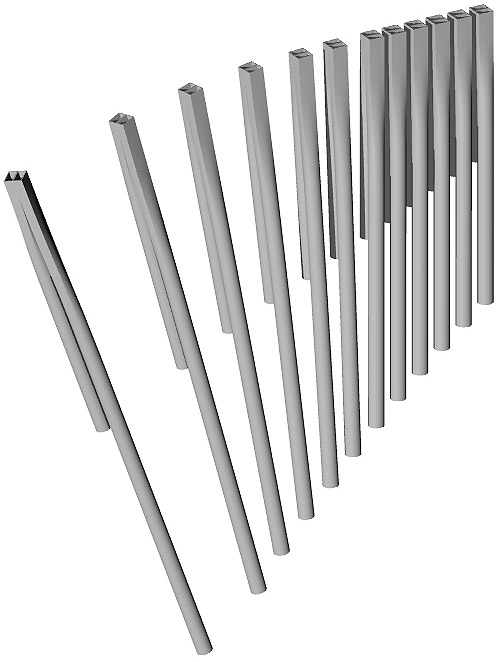
The sound spectrum of panpipes is weak to non-existent in the even-numbered partials. So to offset this and give the sound added punch I paired each pipe with its octave.
Each octave pair thus made had two strips of velcro fixed to each side, male on the left and female on the right.

This allowed me the option of placing the upper or lower octave facing me. So a chromatic set of twelve octave pairs provides a usable range of two octaves. The tube further away from the player receives less air and gives just enough support to its octave partner for a beefy sound.
The further down you get in the low range of the panpipes the more puff you need to make a sound. Furthermore, the wider diameters necessary for bass frequencies mean that more air is dissipated between lip and blowing edge.
Part of the problem of the weak sound-to-puff ratio is down to wave interference from out-of-tune partials. Some correction is possible with a “truncated paraboloid” bore. This is the profile I use for my concert panpipes.
Obviously it would be prohibitively expensive to form large plastic tubes to a true paraboloid profile. But the design presented here offers a way round that problem, that also brings the blowing edge closer to the lips, while keeping the sides flush for the velcro.
When a softened plastic tube is gradually flattened, the cross section area is reduced. Thought experiment: when the tube it is completely flat it is down to zero. We obviously don’t need to go that far.
The former below produces a virtual paraboloid bore by partially compressing the softened end of the tube to a rectangle. An electric paint-stripper gun will do the softening, though you might need some practice first to learn to avoid scorching the plastic.

The distance between the sides of the trough should be same as the tube’s diameter, so that the tube fits snugly. If you are a handyman you could invent an adjustable model for different diameters.
You will need to find a solution to block the bottoms of the tubes. I used wooden stoppers that I cut out with a cloche, wrapped in chamois leather soaked in walnut oil. The seal must be perfect for a good sound.
As for lengths, start with the longest length you can comfortably play in vertical position. Push the stopper in small increments up the tube until your tuner says you have found an identifiable note. Measure the inner length down to the stopper. You can then cut off the excess below the stopper.
Work out the inner tube lengths of all the other notes by dividing by 1.06 per semitone. For the octaves of each tube, divide by 2. Remember to add a constant length for the stopper before cutting. Fine tuning will be necessary. Length depends partly on diameter so I can’t offer a table of lengths. You are on your own!
If you used the former above, the back side of each tube (that was lying downward in the trough) will be flat along its whole length. This is the side that you glue to its octave partner. The rectangular mouthpieces should thus meet back to back.
After a few years of use, the velcro adhesive starts sliding around and you will want to find another solution. Between now and then you have plenty of time to come up with one!
Let me know how it goes, and feel free to ask me anything in the comments below.


